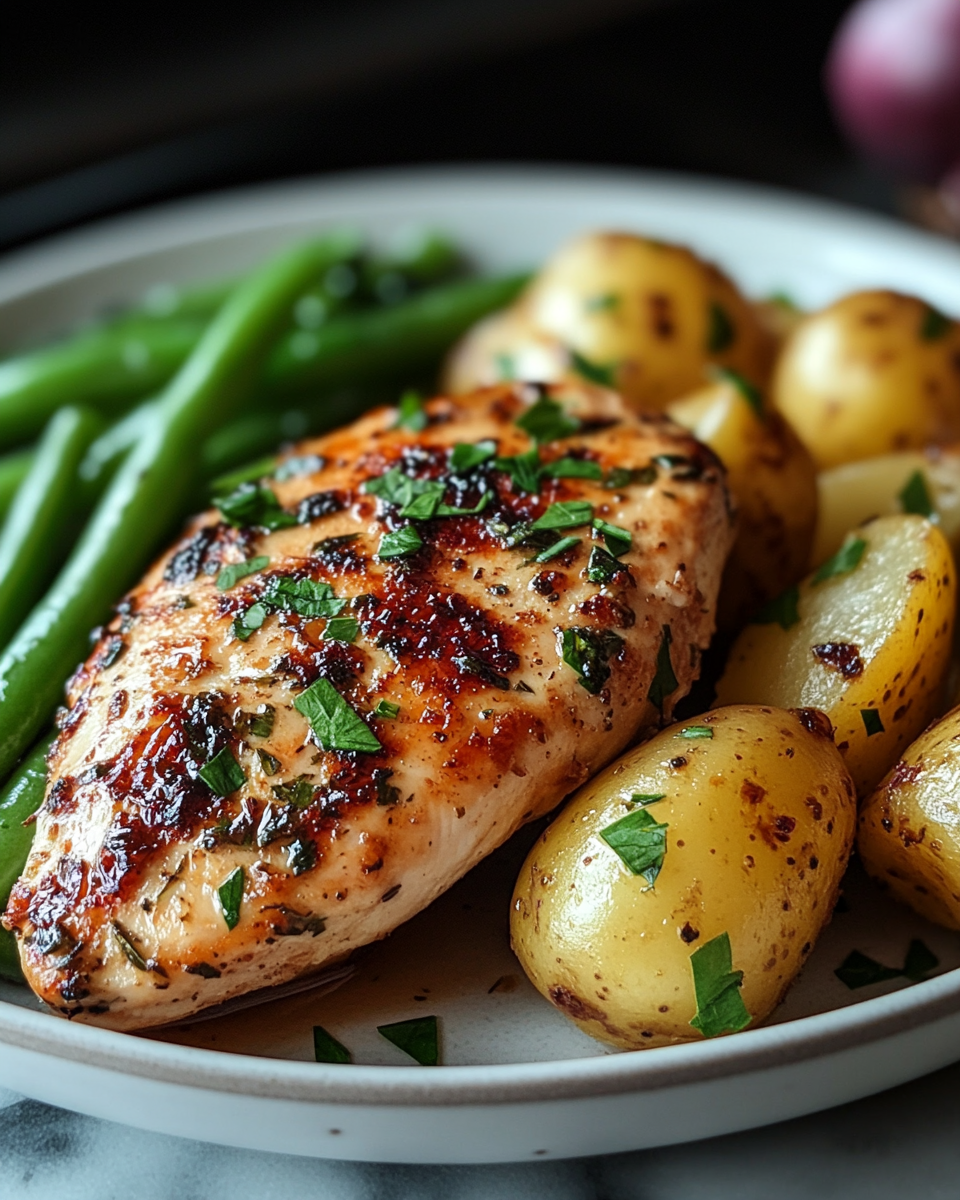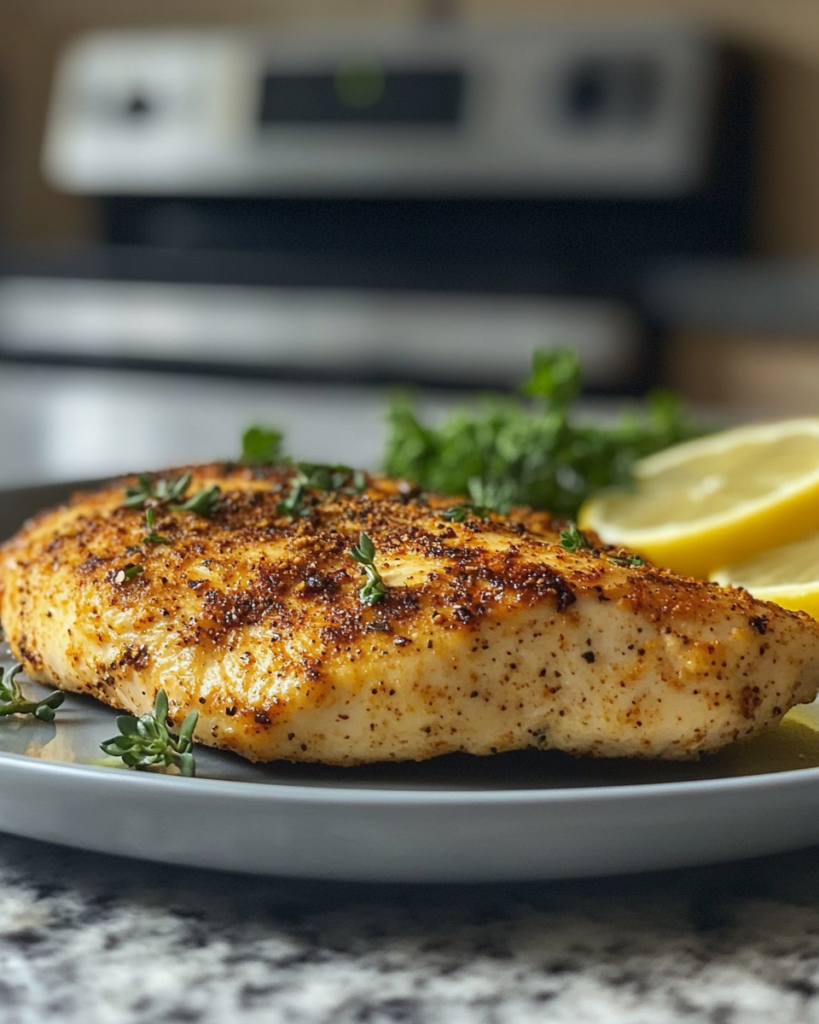
Juicy air fryer chicken breast delivers tender texture with crisp edges using a fast air frying method that keeps moisture inside the meat while creating a lightly golden surface. This dish suits busy schedules while still delivering rich flavor and satisfying bite.
Air frying gives chicken breast a consistent result without heavy oil or complicated steps. The circulating heat surrounds each piece, allowing even cooking while sealing natural juices inside. The result is soft, tender slices that pair with many sides and sauces.
This recipe focuses on balance between seasoning, timing, and temperature control. Each step is designed to support moisture retention and avoid dryness, which is a common issue with lean poultry cuts. The seasoning blend builds savory depth while keeping the chicken versatile for multiple serving styles.
The process works with basic kitchen tools and standard pantry ingredients. No complex preparation is required, and the cooking process fits into a short window, making it suitable for weeknight meals or meal preparation routines.
Ingredients Overview
Chicken breast is the central ingredient in this dish, valued for its lean protein content and neutral flavor. Because it contains minimal fat, it requires careful cooking to maintain tenderness. Air frying supports this by surrounding the meat with consistent heat, preventing moisture loss during cooking.
Olive oil plays an important role in helping seasonings adhere to the surface while supporting browning. A small amount is sufficient to create a light coating that prevents dryness without making the dish greasy.
Garlic powder and onion powder add savory depth without overpowering the natural taste of the poultry. These dry seasonings distribute evenly across the surface and penetrate during cooking.
Paprika contributes mild warmth and subtle color. It enhances visual appeal and adds gentle flavor complexity without introducing heat unless a smoked variety is used.
Salt and black pepper form the foundation of seasoning. Salt supports moisture retention within the meat fibers, while black pepper adds a light sharp note that balances richness.
Optional additions such as dried thyme or oregano introduce herbal tones. Lemon juice or zest can also be used after cooking to brighten the final flavor profile.
Each ingredient works together to create a balanced seasoning layer that supports the chicken’s natural texture. Substitutions such as avocado oil for olive oil or smoked paprika for standard paprika can adjust flavor direction without altering the cooking process.
Ingredients
2 large chicken breasts
1 tablespoon olive oil
1 teaspoon garlic powder
1 teaspoon onion powder
1 teaspoon paprika
1 teaspoon salt
1/2 teaspoon black pepper
1/2 teaspoon dried thyme (optional)
1 teaspoon lemon juice (optional, after cooking)
Step-by-Step Instructions
Begin by preparing the chicken breasts. Place them on a clean surface and gently press to create an even thickness. This step supports uniform cooking, preventing thinner sections from drying while thicker areas finish cooking. Even thickness is important for consistent texture.
Pat the chicken dry using paper towels. Removing surface moisture helps the seasoning adhere and supports light browning during air frying. Excess moisture can create steaming instead of roasting inside the air fryer basket.
Drizzle olive oil over both sides of the chicken. Spread it evenly using hands or a brush until a light coating covers the surface. This layer helps carry seasoning and supports gentle crisping.
In a small bowl, combine garlic powder, onion powder, paprika, salt, black pepper, and optional dried thyme. Mix until evenly blended. Sprinkle the mixture across both sides of the chicken, pressing lightly so the seasoning adheres.
Preheat the air fryer to 190°C (375°F) for a few minutes. Preheating supports immediate surface searing when the chicken enters the basket, helping lock in juices.
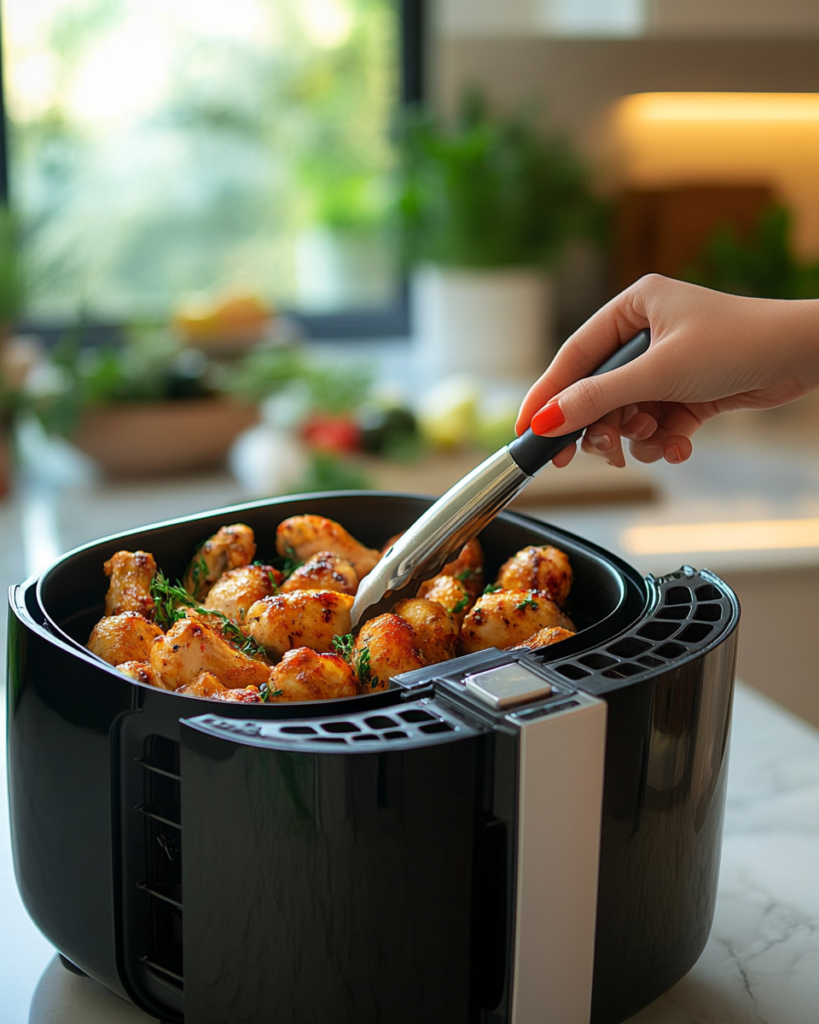
Place the chicken breasts in the air fryer basket in a single layer. Avoid overlapping pieces, as spacing allows hot air to circulate evenly around each portion.
Cook for 10–12 minutes, depending on thickness. Halfway through cooking, turn each piece to support even browning on both sides. The exterior should develop a light golden color.
Check internal temperature using a thermometer. The safe internal reading is 74°C (165°F). This ensures full cooking while maintaining moisture inside the meat fibers.
Once finished, remove the chicken and allow it to rest for 5 minutes. Resting allows internal juices to redistribute, resulting in softer texture when sliced.
Slice against the grain for tender bite. The surface should appear lightly seasoned with a warm color, while the interior remains moist and soft.
Tips, Variations & Substitutions
Pounding chicken breasts to even thickness is one of the most important steps for consistent texture. Uneven pieces may cook at different rates, leading to dryness in thinner areas. A light and steady flattening motion works without damaging the structure.
Marination can be added for deeper flavor. A simple mixture of olive oil, lemon juice, garlic powder, and herbs can rest on the chicken for up to 2 hours before cooking. This supports enhanced seasoning absorption.
For variation, smoked paprika can replace standard paprika for a deeper flavor profile. Chili flakes can also be added for mild heat without overpowering the base seasoning.
Greek yogurt can be used as a coating alternative to olive oil for a tangy finish and softer texture. This works especially well for serving with rice or roasted vegetables.
If chicken breasts are smaller, reduce cooking duration slightly to avoid drying. Monitoring internal temperature remains the most reliable method for doneness.
Serving Ideas & Occasions
This chicken pairs well with roasted vegetables such as carrots, zucchini, or bell peppers. It also works with rice, quinoa, or mashed potatoes for a balanced plate structure.
Fresh salads with light vinaigrette complement the savory flavor of the chicken. Wraps and sandwiches also benefit from sliced portions of this dish due to its tender texture.
This recipe suits weekday meals, meal preparation routines, and casual gatherings. It can be prepared in advance and stored for later use in multiple dishes throughout the week.
Simple sauces such as garlic yogurt sauce, honey mustard, or lemon herb dressing complement the flavor without overpowering it.
Nutritional & Health Notes
Chicken breast is a lean protein source that supports muscle maintenance and satiety. It contains minimal fat when prepared without heavy oils or creamy coatings.
Air frying reduces the need for deep frying, lowering overall fat content while maintaining satisfying texture. This cooking method also supports portion control due to its simplicity.
Seasonings used in this recipe contribute minimal calories while enhancing flavor depth. Olive oil adds healthy fats in small amounts, supporting balance in the dish.
This meal fits into balanced eating patterns when paired with vegetables, whole grains, and hydration-focused beverages.
FAQs
How long does chicken breast require in an air fryer?
Cooking duration depends on thickness, typically ranging from 10 to 12 minutes at 190°C. Thicker pieces may require additional time. Internal temperature should reach 74°C for safe consumption. Checking with a thermometer provides the most reliable result and prevents overcooking.
Can frozen chicken breast be used?
Frozen chicken breast requires thawing before air frying for consistent texture. Cooking directly from frozen can result in uneven doneness. Thawing in a refrigerator overnight produces stable results and supports even seasoning distribution.
Why does chicken breast sometimes turn dry?
Dry texture usually results from extended cooking time or uneven thickness. Flattening the chicken and monitoring internal temperature helps prevent moisture loss. Resting after cooking also supports juice retention within the meat.
Can seasoning be changed?
Seasoning can be adjusted based on preference. Herbs such as rosemary, basil, or oregano can replace or complement the base mix. Smoked paprika or chili powder can shift flavor direction without changing cooking steps.
Is oil required?
A small amount of oil supports seasoning adhesion and surface browning. It also helps prevent sticking in the air fryer basket. Alternative oils such as avocado oil can be used with similar results.
Can this recipe be stored?
Cooked chicken can be stored in a sealed container in a refrigerator for several days. Reheating in an air fryer helps maintain texture. Slicing before storage can support quick meal assembly.
What sides work well with this dish?
Roasted vegetables, rice, quinoa, and fresh salads pair well with air fryer chicken breast. Light sauces or dressings can also be added to adjust flavor without overwhelming the seasoning.